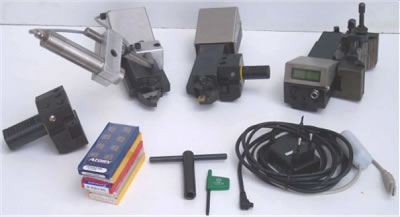
| printable version | Tool dynamometer turning DKM 2010 | ||
| |||
NEW 5- Components Dynamometer for measurement of cutting forces and tool tip temperature in turning processes | |||
DKM2010 is now a 5-Components Tool Dynamometer,
It measures
| |||
| It is as small as
the former type A, but measures forces up to 2000 N With help of the adjustable inserts holder for indexable inserts ISO type CCM..9 approach angles of 45 60 75 90° are easily adjusted. With USB interface data acquisition rate now can be adjusted up to 100 SPS . The measured values can be read on the internal display using auto-hold. The PC-based data acquisition is performed over the built-in USB interface with our included software for tool dynamometers. Over the same interface the device parameter setup for wear detection is executed. After the setup, the device is able to supervise a turning process without a connected PC. Also available is a temperature measurement of the tool tip, which is fully integrated in the device. With this great properties the device suits multiple educational and industrial applications. | |||
Downloads: | |||
Measuring systems : Strain gage sensors with very small deflection, range 2000N, resolution 1 N, data acquisition rate adjustable 5 – 100 SPS | |||
Clamping; Adjustable inserts holder : Thanks to the
bars left and right side of the body the DKM2010 can be clamped in every
turret on the lathe and be operated in longitudinal or cross feed on konventional
or CNC lathes. The bars are 12 mm high. | |||
Experiments: The following experiments are possible:
| |||
Keywords: Cutting tool dynamometer, Cutting
dynamometer, Tool dynamometer, cutting thrust meter, wear detection, break
detection, tool monitoring, Turning, Borehole, Power, Force, Feed, Cut,
Cutting, Burr, Temperature, Torque, Reduction of wear and tear, wear out |
|||
| ©TeLC Unna 2004 | |||
